Changing the Appearance of a Minecraft Creature
We’ve been working on customizing Minecraft for a while, but this weekend, we started on our first resource pack. Resource and Behavior Packs allow deeper customization of both appearance and behavior in the game.
The Simplest Resource Pack
There are a large amount of tutorials online, but it was still hard to find a straightforward “Hello World” of resource packs. So I made a Resource Pack which only changes the appearance of a single mob - the creeper.
-
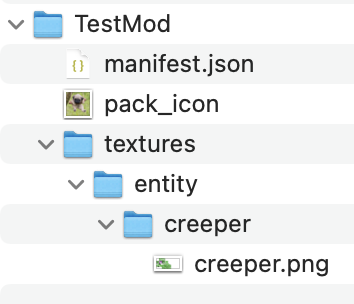
Create a directory for your mod, and then create a text file called manifest.json, and add the following text:
{ "format_version": 2, "header": { "description": "CreeperMod changes the look of the creeper.", "name": "CreeperMod", "uuid": "-Replace with a new generated uuid-", "version": [0, 0, 1], "min_engine_version": [ 1, 14, 0 ] }, "modules": [ { "description": "CreeperMod", "type": "resources", "uuid": "-Replace with a different new generated uuid-", "version": [0, 0, 1] } ] }- The description fields can be whatever you’d like them to say.
- Replace each uuid field with a separate generated UUID. You can use a site like https://www.uuidgenerator.net to generate 2 UUIDs to use in your manifest.json.
-
Create a directory inside the mode directory called textures and another directory inside that called entity, and inside of that another directory called creeper. Copy the existing creeper.png from the Vanilla Minecraft Resource Pack. You can get that here. The files in your mod should now look like this. The links are a little hard to see, but they are there. The files in your mod should now look like this.
-
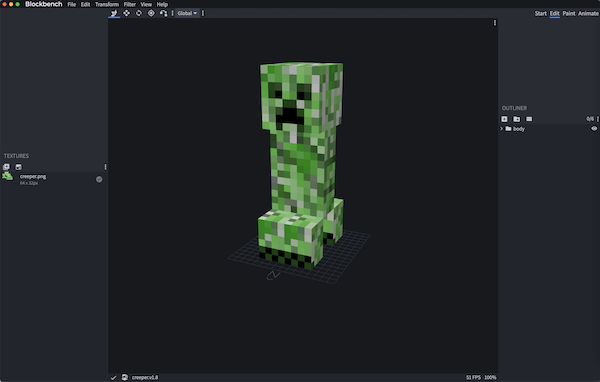
Now open up the creeper.png texture. It’s tiny, but if you zoom in, you’ll see all the parts of the creeper represented.

-
Creeper.png is the skin of the creature “unwrapped” - this is how the Minecraft game stores and interprets the appearance of the creeper.
- It’s pretty cumbersome to edit this unwrapped texture directly because it can be hard to visualize how the texture will look when wrapped back onto the creature inside the game, but editing the image with any image editor (like Pixelmator on the Mac) will work.
- Tools like Blockbench or Nova Skin let you paint on the model in it’s more familiar “wrapped” state and then export the texture back out.
-
Once you’ve edited the creeper texture how you’d like, zip up the mod directory. On the Mac, you can just use the “Compress” menu item from the right-click menu.
-
Copy the zip file to your Minecraft game. If you are using Minecraft on an iPhone or iPad, you can use Airdrop/Email/Messages or any other way to get your .zip file to your Files app. Once there, move the zip file into the “behavior_packs” directory inside of the Minecraft folder inside the Files app.
-
Start up Minecraft, create a New World. In the creation settings menu, scroll down to Resource Packs - You should see your new resource pack there, and you should be able to “Activate” it.
-
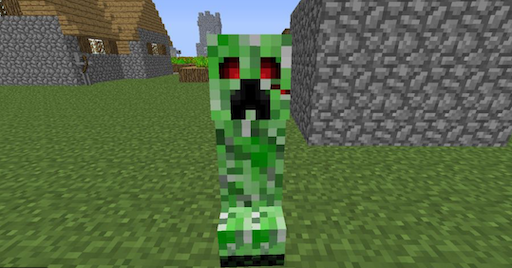
Play the game, and then find, summon or spawn a creeper. The creeper should have your new texture.